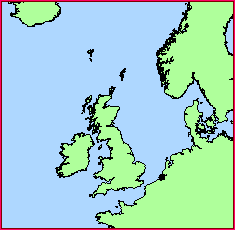
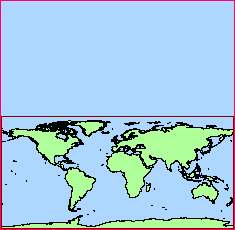
 Unprojected
Projections
Two states of projection are supported by the STEMgis; projected and unprojected. Unprojected, implies no projection or warping of the spatial data with co-ordinates in terms of latitude and longitude. Projected data, 'projects' the map co-ordinates onto a surface such as a cylinder, in an attempt to produce a more realistic appearance in terms of line and area measurement. STEMgis supports the 1210 projections defined by the European Petroleum Survey Group and allows users to also define their own projections.
Projected  Unprojected
There are three icons on the toolbar that change the projection state or projection type:
- Set the state to 'projected' using the currently defined map projection
- Set the state to 'unprojected'. Units are in decimal degrees.
- Change the current map projection
Changing the Map Projection
Clicking on the icon ![]() gives
the following projection form:
gives
the following projection form:
The pre-defined map projection can be selected from the scrollable list. Many of the projections are grouped together (e.g. WGS84 UTM zones) - to select a projection click on the cross and then select the desired projection. Information regarding the selected projection is displayed to the right of the list and to reproject your map click the OK button.
Clipping the Map Projection
Many of these pre-defined map projections are designed for specific areas around the world. For instance, the British National Grid is relevant only to the United Kingdom. However, the map layers you are using may cover a much larger area than that to which the projection applies. Applying the projection to your map is likely to produce a wrap around effect:
To avoid this the map data must be pre-clipped in its unprojected state and then post-clipped in its projected state. The lower part of the dialog box allows the user to change these clip limits. Some of the projections have limits that have been stored in the database. If these exist they are retrieved and entered into the text boxes in the projection form. If they are not available then STEMgis attempts to automatically define some sensible limits (however this is not always possible, so user intervention may be required). The automatic method takes a border (user changeable in the 'Border from origin' textbox) from the origin of the projection for the pre-clipping and then tries to make the largest square it can within the projected latitude/longitude borders.
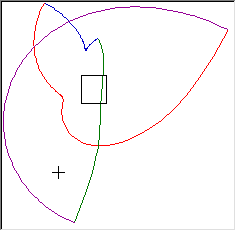
The pre-clipping and post-clipping limits are shown within the limits display box. They are shown in their projected form. Many projections display a fairly simple pre-clipping shape as shown above, but others may be more complex, such as the New Zealand Map grid shown below.
 |
blue line shows the northern latitude limit green line shows the eastern longitude limit purple line shows the southern latitude limit red line shows the western longitude limit |
It is impossible to automatically find the relevant area within such a shape, so user definition of clipping areas is required. The STEMgis database administrator can add or edit these limits within the STEMgis Manager so that future users do not need to define the limits.
User-defined Projections
The user may also define their own projections if they wish. To do so, click on the 'Select User Defined Projection' and the following form will appear:
Select a projection type from the Projection drop-down list and then specify the remaining parameters for the chosen projection. You can test the projection by using the 'X in', 'Y in', text boxes and clicking on the test button. You can save the user defined projection by clicking on the 'SAVE Projection' button and select it as the current projection by clicking on the 'SETUP Projection' button.
To retrieve previously defined user projections use the 'USER' drop-down list. To delete a user projection click on the 'Delete' button.
| Browser Based Help. Published by chm2web software. |